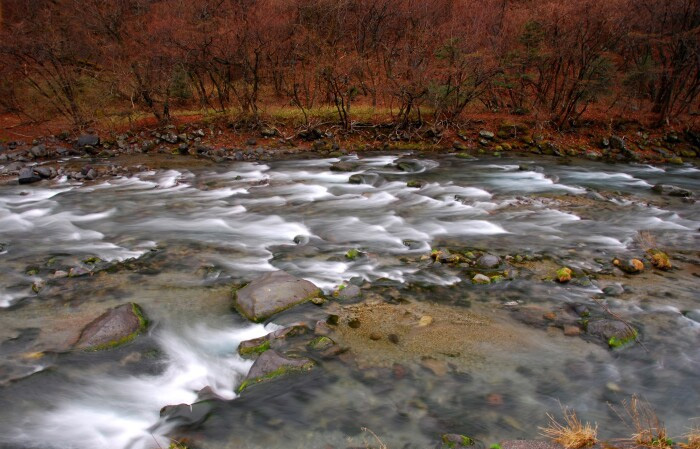
 Photos of surreal and silky waters never fail to amaze me when I was a newbie to photography and it continues to do so even up to the present. In this article, I will share with you some of the techniques I have gleaned from shooting surreal waters, and perhaps after reading, you could adopt some of these to achieve your own “surreal water” photos.
Principles of Silky Waters
The key to surreal/silky waters is the control of the shutter speed. As long as we can keep the the shutter open while the water flows for an extended time, silky water will emerge in your photograph -just like magic. Let’s take a look on how this can be achieved in the next section – Techniques.
Techniques
This section will step through the key processes which should be considered during the capture of surreal water photos. Of course, we expect that you would have already chosen a good composition to start with. 🙂
1) Use of Manual Mode. To achieve the shutter and aperture control, you may need to go into Manual mode on your camera. Use the lowest possible ISO on your camera. e.g. 50,100 or 200 depending on your camera model.
2) Select a Shutter Speed. The desired shutter speed is around 1/2s to 4s for fast water flows e.g. dams, waterfall, crashing waves etc. Slower waters will require 4s to 8s or more.
3) Select an Aperture. For landscapes, it is preferred to have sharp foreground and also relatively sharper background. For this purpose aperture size of more than f8 i.e. f8, f11 etc may be suitable.
4) Use of Dark/ND Filter (if not available, use the lowest ISO available on your cam). If you found that after selecting the suitable shutter and aperture and your picture is still overexposed, that means the scene is too bright. To overcome this problem, you will need to attach a dark filter over the lens. This can be accomplished by using either (a) a polariser (enabling about 1/2 to 1 stop less light); or (b) a dark filter/ND filter (ND2 to 8 can be used depending on how bright the scene is). The filter darkens the whole scene so that the slow shutter speed can be used. In fact, you may wish to use a polariser even if the scene is not overexposed, because it will cut out glare from the water surface and increase contrast, making the scene even more dramatic. There is a bit of trial and error here that you may need to adjust to specific situations.
5) Use of Tripod. You will need a tripod. It is a must in my personal experience. A tripod allows you to take a long exposure without the handshakes, so that your photos turns out sharp (except of course, water, which must be blurred and silky).
6) Check your VR setting. If you have Vibration Reduction (VR) on your lens, turn it OFF as it may hinder the process of getting sharp pictures. VR is useful when you are taking hand-held photos, and not necessary for tripod-mounted cameras.
7) Focus Correctly. Focus about 1/3 way into the scene. This usually works for me. If you want a particular feature or foreground to be sharp, by all means, focus on the subject. If there is no strong foreground, the 1/3 focus rule would be a good start.
8) Reduce Shutter Vibrations. Use an infra-red wireless shutter controller or a cable release mechanism to activate your shutter, so that shutter activated vibrations are kept to a minimum.
9) Finally, Fire off your shutter.
10) Review the picture. Usually, multiple retakes are necessary, as I don’t usually get it right first time.
11) Repeat 9 to 11 until you are happy with the results. i.e. Keep trying! 🙂
Tips
1) If there are sea/salt sprays due to proximity to the sea/waters, use a cardboard to shield the front of the lens and only move away the cardboard before the shooting. This keeps water droplets out of the len’s surface.
2) If a strong wind blows, the tripod may vibrate or move slightly. In this case, use a weight to weigh down the tripod and make it more stable, or find a less windy place to shoot.
3) Observe the rhythm of the sea waves/water and time your shutter release. If you want to depict the strength of the crashing of waves, the best time is when the water crashes on the rocks and recedes. If you want only the water lines on the rocks, release only after the crashing of the waves has occurred. As you will realise, the timing all depends on what you would like to capture.
I hope you will benefit from this short article on shooting surreal waters.


Good stuff, here. Might I also suggest to bracket different shutter speeds, and don’t trust your on-camera screen to judge your results. Also, use the lowest ISO setting you can, if a ND filter isn’t available. Making water photos is a rich vein for photographers to explore. Splash!