Updated Jun 2020 (with amazingly high success rate!)
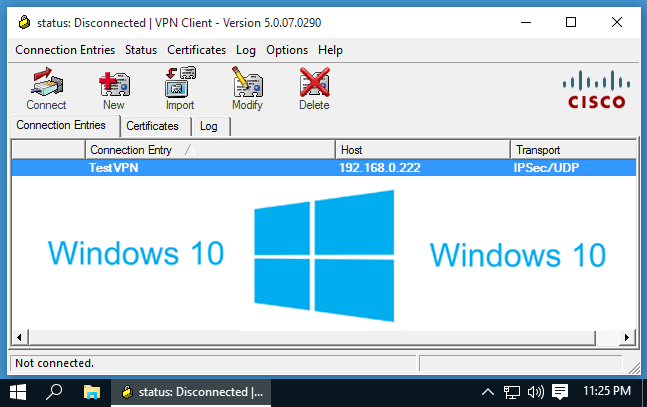
When the world moved to Windows 10, those would could not and would not move their legacy Cisco VPN software would have hit some problems while using VPN on their newer Windows 10 machines. This is because the legacy Cisco VPN-client is not supported under Windows 10 and as the client is EOL anounced, it probably will never be supported anymore. Yet, for some reasons, there are still users (like myself) who are not able to use the newer Cisco AnyConnect, as it might not be supported by their existing VPN infrastructure or some other reasons. Faced with similar issue, I searched for possible solutions online and tried different ways of overcoming the issues, which is often a hit and miss affair.
This is the newer guide for Windows 10. If you are looking for the Windows 8 guide for Cisco VPN client, visit this guide here instead.
( This tutorial is becoming even more robust as more and more reported success and provided additional tips to improve the process, and I have enhanced the tutorial, to make it as foolproof as possible for you. Many reported they can now work from home, or use a single machine to access VPN instead of two machines, or simply made their life much simpler! Thanks to the Gleescape.com community, this tutorial has become a better one.)
Most users will face the first error, which says:
Secure VPN Connection terminated locally by the Client.
Reason 440: Driver Failure.
Rebooting the machine does not help, trying all other solution does not help. After some fumbling, painful, repetitive, trial and error, finally I found the way to do it right.
You can do like-wise by following the steps below, to ensure that your Cisco VPN Client continues to work well after migrating to Windows 10 OS.
If you are lazy (or too busy) to find the software listed below in the instructions, you can download the all-in-1 package from here for your convenience (hosted locally): Win10 All-in-1 (version 3, 2018), Win10 All-in-1 here (version 2, 2015-2017).
As the usual disclaimer goes, with the ever changing OS updates and software patches, I will not be held responsible if anything goes wrong with your computer or hardware or software, or causes you to suffer any loss of any sorts, so do backup your data if you want to go ahead. Ok, now that we have got the disclaimer out of the way…
Gentle Reminder 1: Please uninstall any previously installed Cisco VPN Client software or DNE updates that you may have installed prior to this guide. This ensures a clean configuration for the guide to work properly. A “clean” network stack is critical for success.
Gentle Reminder 2: Where possible, you should execute the software programs below with Administrator rights, to avoid any access rights/execution problems later on.
 Prep Step 1: Disable Your Secure Boot
(Only if applicable. If your secure boot is NOT enabled by default, then skip this! 🙂
First step you would need to tackle would be the secure boot that is offered on the newer hardware and Windows 10.
While secure boot is a useful security standard developed by members of the PC industry to help make sure that your PC boots using only software that is trusted by the PC manufacturer, sometimes it gives us more problems than convenience. Many older 32-bit (x86) drivers are not signed, because kernel-mode driver signing is a recent requirement for Secure Boot. Therefore, in this case, the older Cisco VPN software is not compatible with secure boot, and means that you will have to disable secure boot on your PC. This may be escalating problem if you are using BitLocker, and it may require you to get a recovery key to boot in non-secure-boot mode. Well, at least it was necessary on my Windows machine.
- Open the PC BIOS menu. You can often access this menu by pressing a key during the bootup sequence, such as F1, F2, F12, or Esc.
- Or, from Windows, hold the Shift key while selecting Restart. Go to Troubleshoot > Advanced Options: UEFI Firmware Settings.
- Find the Secure Boot setting, and if possible, set it to Disabled. This option is usually in either the Security tab, the Boot tab, or the Authentication tab.
- Save changes and exit. The PC reboots.
- Install the graphics card, hardware, or operating system that’s not compatible with Secure Boot.
Note: In some cases, you may need to change other settings in the firmware, such as enabling a Compatibility Support Module (CSM) to support legacy BIOS operating systems. To use a CSM, you may also need to reformat the hard drive using the Master Boot Record (MBR) format, and then reinstall Windows. For more info, see Windows Setup: Installing using the MBR or GPT partition style. On some machines, you may see a watermark on the desktop alerting you that Secure Boot is not configured correctly. Get this update to remove the Secure Boot desktop watermark.
Prep Step 2: Download the Cisco VPN Software
You may get the Cisco VPN Software from here:
Cisco VPN client download:
- 32-bit Windows 7 / Vista / XP VPN Client (version 5.0.07); or
- 64-bit Windows 7 / Vista VPN Client (version 5.0.07); or
- 32-bit Windows 2003 / 2000, TabletPC 2005 / 2004 * (version 5.0.05)
The following are the versions that are available as far as I know (and works for this tutorial ):
- 32-bit Windows 7 / Vista / XP VPN Client (version 5.0.07)
- 64-bit Windows 7 / Vista VPN Client (version 5.0.07)
DO NOT install the Cisco VPN client software just yet. Make sure any versions you might have installed are cleanly uninstalled with all directories removed just to be on the safe side.
Reboot.
Clean Step 3: Install and run the DNE fix from Citrix
DNE stands for Deterministic Network Enhancer. This actually helps make sure that the DNE is fixed and cleaned up, in preparation for the Cisco VPN client software. The winfix.exe file is already part of the download package so you can find it inside. Alternatively, you can download winfix from Gleescape here.
Reboot.
Install Step 4: Install the Sonic VPN and then Cisco VPN Client Software
Install the Sonic VPN software (which will be able to install the right version of the DNE). The installer can be found in the All-in-1 download link above. Sonic VPN will ensure the right DNE is installed.
Reboot.
Run vpnclient_setup.MSI and NOT the vpnclient_setup.EXE. This will increase the success factor of your installation. Some users have experience problems with running the .exe version of the installer. Follow the usual installation steps thereafter.
Reboot.
Tweak Step 5: Make changes to the registry
If you do not make changes to the registry, you are likely receive the following error:
Secure VPN Connection terminated locally by the Client.
Reason 442: Failed to enable Virtual Adapter.
1. Open Registry editor regedit in Run prompt
2. Browse to the Registry Key HKEY_LOCAL_MACHINE\SYSTEM\CurrentControlSet\Services\CVirtA. Some of the viewers have indicated that HKEY LOCAL MACHINE\SYSTEM\Current Control Set\Services\vpna is the one to be changed (if the former does not work).
3. Select the Display Name to modify, and remove the leading characters from the value data value as shown below,
For x86 machine, shorten the string “@oem8.inf,%CVirtA_Desc%;Cisco Systems VPN Adapter” to just “Cisco Systems VPN Adapter”
– For x64 machine, shorten the string”@oem8.inf,%CVirtA_Desc%;Cisco Systems VPN Adapter for 64-bit Windows” to just “Cisco Systems VPN Adapter for 64-bit Windows”
4. Reboot.
5. Once you have rebooted. You should be able to run your Cisco VPN client software successfully.
 Troubleshooting Section (especially for Windows 10 users)
 Problem 1
You cannot ping your corporate servers using domain names e.g. proxy.mycompany.com:8080, fileserver1.mycompany.com.
If you experience DNS lookup problems after the VPN is connected, do this: set IP metric for the Cisco VPN to 1, and set the IP metric for Local LAN connection to 50. This will prioritise the Cisco VPN for DNS lookup when it is connected, hence your corporate servers’ DNS look will work correctly. (thanks to Chris’ tips!). Just do the following:
Step 1: Click on the network icon on the system tray, select “Network Settings” -> “Change Adapter Options”. You will be show the list of adapters/connections in your PC.
Step 2: Right-click on the wired/wireless LAN connection, select “Properties” –> Select TCP/IPv4 –> Click “Properties” –> Advanced –> Uncheck Automatic Metric –> Type “50” in the Interface Metric field.
Step 3: Right-click on the “Cisco Systems VPN adapter” or Cisco Systems VPN adapter for 64-bit Windows”, select “Properties” –> Select TCP/IPv4 –> Click “Properties” –> Advanced –> Uncheck Automatic Metric –> Type “1” in the Interface Metric field.
Problem 2
You still experience 442 error even after changing the registry string
You can try to disable Internet Connection Sharing (ICS) – tip from Phil Raymond.
Problem 3
You experience Error 433 after following the instructions:
Secure VPN Connection terminated locally by the Client.
Reason 433: Reason not specified by peer.
The likely reason was apparently due to the DNE LightWeight Filter network client not being properly installed by the Cisco Systems VPN installer, or something is wrong with DNE.
To solve this, please try to do the following in the exact order:
A) First, uninstall any Cisco VPN Client software you may have installed earlier (especially if you have upgraded from Windows 8/8.1);
B) Then uninstall any DNE updater software(s) you may have installed earlier (especially if you have upgraded from Windows 8/8.1);
C) Reboot your computer.
D) Run winfix.exe again, to ensure the DNE is properly cleaned up. (thanks to Jason’s tip!)
E) Reboot your computer again.
F) Install the Sonic VPN software (which will be able to install the right version of the DNE).
G) Reboot your computer.
H) Reinstall the Cisco VPN Client software again. (You do not need to uninstall the Sonic VPN software from step G). I would recommend that you run the vpnclient_setup.MSI file instead of the vpnclient_setup.EXE file, to improve the odds of success. (thanks to NovakDjoković’s tip!)
I) Perform registry fix (Step 5) if not fixed yet.
Problem 4
You still experience 443 error even after following the steps
Step 1: Click on the network icon on the system tray, select “Network Settings”.
Step 2: Go to the “Network and Sharing Center”under “Related Settings” –> “Change Advanced sharing settings”, Under “HomeGroup connections”, select “Use user accounts and passwords to connect to other computers” –> “Save Changes”.
Problem 5
After Windows 10 Service Pack/updates, your VPN software stopped working! 🙁
The Windows 10 update may have partially removed components of the VPN client. So the trick is as follows:
Step 1: Uninstall the VPN client using the “Programs and Features”, choose the VPN client software, click uninstall.
Step 2: Follow the instructions for reinstallation of the VPN client (i.e. Follow Steps 4 – “Install the Sonic and Cisco VPN Client Software” and Steps 5 – “Make changes to the registry” above).
Problem 6
I still cannot access my remote sites for some reasons
Ok, given that permission settings on some computers can be iffy, you can try this:
A. Go to C:\Program Files (x86)\Cisco Systems\VPN Client directory.
B. Select cvpnd.exe and vpngui.exe files, and change their compatibility settings to “Windows 7”.

Last Words
Please let me know if these solutions work for you in Windows 10 by adding into the comments below, and let’s see how we can fix/put this guide even better this together! :))
If you have used this guide and found it to be very useful, please support my efforts with a drink (just click on the button above) 🙂 lol. I spent hours on the Internet piecing solutions together and trying it myself on my Windows machine in order to make this work. I hope you found it useful too.


This is the best fix available.Works very well in windows 10.Should be the first link in google for the fix.Thank you very much.I had tried all the options like registry changes disabling VPN manually etc .However the fix with Automatic metric in IPV4 fixed he issue.
Folks,
Has anyone resolved network access with Windows 10 native apps like Edge or the Windows App Store when the Cisco VPN is connected? For me Edge refuses to connect anywhere so any other modern Windows 10 app. Chrome, IE, Outlook 2016 works. Any ideas?
After applying the registry hacks mentioned I still got a 442 error. This was on a clean install of a brand new Windows 10 Home computer. After exploring the registry I had an additional entry HKEY_LOCAL_MACHINE\CurrentControlSet001\Services\CVirtA that has that need to be modified as mentioned if this Excellent!!!! Webpage Thanks a million.
Perfect! After cisco anyconnect stopped working with my Windows 10 PC (64-bit, Version 1709; error: “the connection was terminated to to a loss of communication”; worked with my win 7 PC though) I remembered how great the “original” cisco vpn client has been and looked for a way to install it on Windows 10. I found this solution and everything worked. Thanks a lot!
Thanks for the very helpful tips. Enjoy the drink. Windows 10 issue resolved
looks like update 1709 killed this fix
For Windows update by Service Pack or big updates: 1) Just repair Cisco VPN client: Control Panel > Program and Features > Right click – Repair 2) Reboot 3) Change Registry key as before 4) Reboot. It will work
Thanks Steve, saved me a lot of time!
After creator update on win 10 I simply had to go to the msi right click and repair option. Reboot and then do the registry edit because the key is back again and it works. No need to uninstall it just repair and reboot.
Can anyone help please? I tried all options but facing Error 412. Kindly help
My install was working perfect until there was another Cisco app update.
My fix was just to install the newest version of the Sonic GVC VPN software. When running the install it removed drivers that weren’t working. It then made me reboot. When it rebooted, it reinstalled the cisco client. Once the reinstall was done, I was then able to continue the Sonic GVC VPN software installation. Once this was done, it all worked again.
Hi everybody! Try to build Strongswan vpn client binaries for Windows, and try to connect without any Cisco client or other tools…
Hi… yes I was able to successfully install Cisco vpn client on my windows 10, 64-bit OS PC.
I did encounter errors 442 “failed to enable virtual adaptor” and 433 “vpn connection failed” so I followed the “Additonal Steps for Windows 10 Users” and then I was able to connect to the cisco vpn client and remote connect to my site.
Thank-you very much for your assistance Gleeful Gleescaper
Hello, thank you, friend. I’m still receiving an error,
—
Secure VPN Connection terminated locally by the Client
Reason 429: Unable to resolve server address
—
Can somebody help, please?
Your solution helped me. When I was trying to “Add VPN Connection”, my only choice for VPN provider was “SystemSettings.ViewModel.SettingEntry”, what??? When I downloaded the winfix.exe mentioned above and ran it, then rebooted, I was able to select “Windows (built-in)” as expected. I was then able to add the Meraki VPN Client. I am buying you a drink! Thanks friend.
You are a righteous dude. Thank you so much.
Yes it is working after installing Win10 service pack. Thanks a lot.