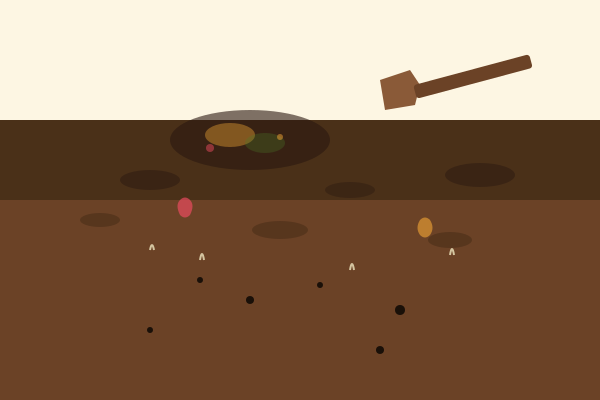
Compost happens. That's the most important thing to understand before you start. Nature has been composting since the first leaf fell, and she doesn't need your help. Left alone, organic matter will decompose into rich, dark, crumbly humus — the process is inevitable. What you're doing when you "make compost" is speeding up the process, managing it so it doesn't smell, and directing the output into your garden.
Once you internalize that — that you're not creating something, just helping something along — composting loses its intimidation. It's not chemistry. It's not a delicate science. It's a pile of stuff, rotting on purpose, with you as the benevolent supervisor.
The Two Ingredients: Greens and Browns
Every compost guide talks about "greens" and "browns," and for good reason. This is the fundamental ratio that makes compost work.
Greens (Nitrogen-Rich)
Greens provide nitrogen, which feeds the microorganisms that do the decomposing. Despite the name, greens aren't always green in colour:
- Fruit and vegetable scraps
- Coffee grounds (yes, they're brown but they're "green" — confusing, I know)
- Tea leaves and tea bags (remove staples)
- Fresh grass clippings
- Green plant trimmings
- Eggshells (technically a mineral, but they add calcium)
Browns (Carbon-Rich)
Browns provide carbon, which gives the microbes energy and creates the airy structure that lets oxygen circulate through the pile:
- Dry leaves (the best brown there is)
- Shredded newspaper and cardboard (no glossy paper)
- Straw and hay
- Dried garden waste
- Sawdust and wood chips (use sparingly — they decompose slowly)
- Paper egg cartons (torn up)
The ideal ratio is roughly 3 parts brown to 1 part green by volume. But don't obsess — compost is forgiving. If it's too wet and smelly, add more browns. If it's too dry and nothing's happening, add more greens and water.
What Never Goes in the Pile
Some materials will ruin your compost, attract pests, or create health hazards. Keep these out:
- Meat, bones, and fish — They attract rodents and scavengers and smell terrible. (Some hot, well-managed composters handle these, but beginners shouldn't.)
- Dairy products — Same issues as meat.
- Oils and fats — They coat other materials and slow decomposition.
- Diseased plants — Compost may not get hot enough to kill pathogens.
- Weeds with seeds — Unless your pile reaches 140°F+, the seeds will survive and spread when you use the compost.
- Pet waste — Dog and cat feces can carry parasites. (Chicken and rabbit manure are fine.)
- Treated wood — Sawdust from pressure-treated wood leaches chemicals.
- Glossy/colored paper — The inks may contain heavy metals.
Choosing a Compost System
The Open Pile
The simplest system: just pile your materials in a corner of the yard. It works, but it's slow (6–18 months), can attract pests if you're not careful, and looks untidy. Best for large yards where aesthetics don't matter.
The Bin
A contained bin keeps things tidy and retains heat better than an open pile. Options range from a simple circle of wire fencing to commercial plastic tumblers. A three-bin system — one for fresh material, one for cooking, one for finished compost — is the gold standard for serious gardeners.
The best compost bin is the one you'll actually use. A fancy tumbler that you neglect is worse than an ugly wire cage that you fill regularly.
The Tumbler
Rotating drum composters speed up the process by making turning easy. They also keep pests out and look neat. Downside: they're expensive, have limited capacity, and can be hard to load and unload. Good for small spaces and suburban gardens.
Vermicomposting (Worm Composting)
If you don't have outdoor space, red wiggler worms can compost your kitchen scraps in a bin under your sink or in a garage. Worm castings are the richest compost you can make, and the system is odorless if done right. It's the best option for apartment dwellers.
How to Maintain Your Pile
Once you have a pile going, maintenance comes down to four things:
1. Keep It Moist
Your compost pile should feel like a wrung-out sponge — damp but not dripping. In dry climates, you may need to water the pile. In wet climates, cover it to prevent it from becoming a swamp. Too dry and decomposition stops. Too wet and it goes anaerobic, which means it starts to stink.
2. Turn It
Turning introduces oxygen, which the microbes need. Every 1–2 weeks, use a pitchfork to mix the pile, moving the outside material to the centre and vice versa. The more you turn, the faster it composts — a well-turned pile can produce finished compost in 2–3 months. An unturned pile will still compost, but it'll take a year or more.
3. Chop Materials Small
The smaller the pieces, the faster they decompose. Chop kitchen scraps, tear up leaves, run over twigs with a lawnmower. A whole melon takes months to break down; a chopped melon takes weeks.
4. Monitor Temperature (Optional)
A hot compost pile (130–160°F) decomposes fast and kills weed seeds and pathogens. If your pile is large enough (at least 3' × 3' × 3') and has the right green/brown ratio, it'll heat up on its own. You can check with a compost thermometer — if the centre is warm, you're winning. If it's cold, the pile is either too small, too dry, or lacking nitrogen.
How to Know When It's Done
Compost is finished when it's dark, crumbly, and smells like earth. You shouldn't be able to identify the original materials (except maybe an occasional eggshell fragment or twig). Depending on your method, this takes anywhere from 2 months (hot, well-turned pile) to 18 months (cold, passive pile).
When in doubt, give it more time. Semi-finished compost won't hurt your plants, but it may temporarily tie up nitrogen as it continues decomposing in the soil.
Using Your Compost
Finished compost is the closest thing to magic in the garden. Here's how to use it:
- Soil amendment: Work 2–3 inches into the top 6 inches of soil before planting.
- Top dressing: Spread an inch around established plants as a mulch and slow-release fertilizer.
- Potting mix: Mix 1 part compost with 2 parts potting soil for container plants.
- Compost tea: Steep compost in water for 24 hours and use the liquid as a foliar feed.
- Lawn top dressing: Screened compost spread thinly over a lawn improves soil structure dramatically.
Troubleshooting
| Problem | Cause | Solution |
|---|---|---|
| Bad smell | Too wet, too many greens | Add browns, turn the pile |
| Nothing happening | Too dry or too small | Add water, add greens, make pile bigger |
| Fruit flies | Exposed kitchen scraps | Bury scraps under a layer of browns |
| Rodents | Meat/oils in pile | Remove those items, use a rodent-proof bin |
| Slow decomposition | Material too large or cold | Chop finer, turn more often |
The Bottom Line
Composting is the single most impactful thing a home gardener can do. It reduces waste, saves money, improves soil, and closes the loop between your kitchen and your garden. And once you start, you'll never look at a banana peel the same way again — it's not trash, it's future soil.
Start with a simple bin and your kitchen scraps. Don't worry about ratios at first — just get in the habit. The magic will happen whether you manage it perfectly or not. And when you spread your first batch of homemade compost on your garden, you'll feel a particular kind of satisfaction that only comes from participating directly in the cycle of growth.
For more on building great soil, see our guides on building raised beds (which covers soil mixing) and watering strategy. Our plant guide includes soil preferences for every plant we cover.

We write practical, encouraging gardening guides for home gardeners. Every article is rooted in real experience — and a deep belief that everyone deserves a joyful outdoor space.