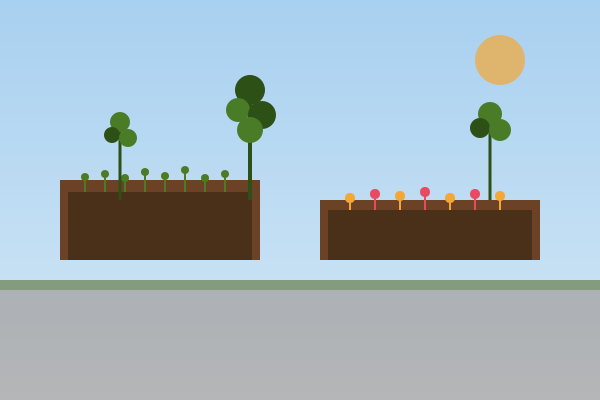
Why raised beds? If you've ever gardened in heavy clay, you know the answer. Or if you've struggled with poor drainage, invasive tree roots, or soil that's been compacted by construction. Raised beds solve all of these problems and more — they give you a controlled growing environment where you call the shots on soil quality, drainage, and even temperature.
But a raised bed is only as good as its construction. Build it wrong and you'll have rotting wood, poor drainage, and soil that disappears over winter. Build it right and you'll have a productive growing space that lasts a decade or more. Let's walk through every decision, from the ground up.
Step 1: Choosing Your Materials
The walls of your raised bed need to hold soil without collapsing, resist rot for as long as possible, and not leach anything harmful into your food. Here are your options, ranked by practicality:
Cedar — The Gold Standard
Western red cedar is the raised bed material of choice for most home gardeners. It's naturally rot-resistant (no treatment needed), looks beautiful, and lasts 10–15 years. It's more expensive than other options, but the longevity justifies the cost. Use 2" × 6" or 2" × 8" boards for the walls — the extra thickness adds years of life compared to thinner lumber.
Juniper — The Sustainable Alternative
If you can find it, juniper is even more rot-resistant than cedar and often comes from invasive species removal programs (particularly in the western US). You're getting a great material and supporting ecological restoration. Win-win.
Pine — The Budget Option
Untreated pine is cheap and available everywhere, but it'll last 3–5 years before rotting. If you're testing whether raised bed gardening is for you, pine is a reasonable starting point. Don't use treated lumber for food beds — the old pressure-treated wood contained arsenic, and while modern treatments are safer, the debate continues. For edibles, stick with untreated wood.
Avoid railroad ties and old pallets. Railroad ties are soaked in creosote, which leaches into soil. Pallets may have been treated with methyl bromide (look for the "MB" stamp and avoid) — only use pallets stamped "HT" (heat treated).
Alternative Materials
Stone, brick, and concrete blocks make beautiful, permanent raised beds but require more skill and money to install. Metal (corten steel or galvanized) is trendy and durable but conducts heat — soil against metal walls can get very hot in summer. Composite lumber (recycled plastic and wood fiber) lasts indefinitely but is expensive and some gardeners avoid it for food production.
Step 2: Size and Dimensions
The golden rule of raised bed design: never wider than 4 feet. If you can't reach the centre of the bed from either side, you can't weed, harvest, or maintain it without stepping on the soil — which defeats the entire purpose of a raised bed (keeping soil loose and uncompacted).
Recommended dimensions:
- Width: 3–4 feet (2–3 feet if the bed is against a wall and accessible from one side only)
- Height: 10–12 inches for most vegetables; 18–24 inches for root crops and accessibility
- Length: Whatever fits your space. 6–8 feet is typical. Avoid going over 10 feet without cross-bracing — long walls bow outward under soil pressure.
Step 3: Construction
Building a basic cedar raised bed is a half-day project. Here's the approach:
- Level the ground. The bed needs to sit flat. Dig a shallow trench if your ground slopes.
- Cut your boards. Two lengths for the long sides, two widths for the short sides.
- Reinforce the corners. Use 4" × 4" corner posts, sunk into the ground a few inches, and screw the side boards to them. This is what keeps the bed from bowing.
- Line the bottom (optional). If you have gophers or moles, line the bottom with hardware cloth (not chicken wire — it's too flimsy). If you're placing the bed on concrete, line the bottom with landscape fabric to keep soil from washing out.
- Don't use a plastic liner on the inside walls. This was popular advice for a while, but it traps moisture against the wood and actually accelerates rot.
Step 4: The Soil — Where Most Gardens Fail
Here's the truth: the soil you put in your raised bed matters more than the bed itself. You can build a beautiful cedar frame and fill it with bad soil and get a terrible garden. Conversely, a rough pine bed filled with great soil will produce abundantly.
The ideal raised bed soil is:
- Light and fluffy — compaction is the enemy. Never walk on your beds.
- Rich in organic matter — 30% or more compost by volume.
- Well-draining — water should disappear, not pool.
- Slightly acidic — pH 6.0–6.8 for most vegetables.
The most cost-effective approach for filling a new bed is the lasagna method — layering materials:
- Bottom layer: cardboard (to smother grass/weeds)
- Layer 2: coarse organic matter — twigs, leaves, straw
- Layer 3: compost or aged manure
- Layer 4: topsoil or potting mix
- Repeat layers 2–4 until the bed is full
These layers decompose over the first season, creating incredibly rich, loose soil. By year two, you'll have some of the best garden soil in your neighbourhood.
Soil is a living thing. A handful of healthy garden soil contains more microorganisms than there are people on Earth. Feed the soil, and the soil will feed your plants.
For a quick fill, mix equal parts topsoil, compost, and aeration (perlite or vermiculite). Avoid using 100% compost — it holds too much water and can be too rich, causing lush foliage but poor fruiting.
Step 5: Spacing — More Room Than You Think
The single most common mistake in raised beds is overcrowding. Those tiny seedlings look so far apart when you plant them — and then they grow, and suddenly you have a jungle where nothing produces well.
Here's a spacing guide for common raised bed crops:
| Crop | Spacing | Notes |
|---|---|---|
| Tomatoes (determinate) | 24" | Cage or stake at planting |
| Peppers | 18" | Closer in rich soil |
| Lettuce | 8–10" | Or 4" for cut-and-come-again |
| Bush beans | 4–6" | Plant in blocks for pollination |
| Carrots | 3" | Thin ruthlessly |
| Radishes | 2–3" | Fast crop, succession sow |
| Basil | 12" | Pinch to bush out |
Step 6: Irrigation and Mulch
Raised beds dry out faster than in-ground gardens because they're elevated and better drained. Plan for irrigation from the start. Drip lines or soaker hoses laid on the soil surface (under a mulch layer) are the most efficient — they deliver water directly to the roots and keep the foliage dry, which reduces disease.
Mulch is non-negotiable. A 2-inch layer of straw, shredded leaves, or grass clippings (from untreated lawns) conserves moisture, suppresses weeds, and breaks down to feed the soil. Bare soil in a raised bed is an invitation to every weed seed in the neighbourhood.
For more on watering strategy, see our guide to watering deeply vs. watering often.
Step 7: Crop Rotation
Don't plant the same crop in the same bed year after year. Soil-borne diseases build up, and nutrients get depleted. Rotate by plant family: nightshades (tomatoes, peppers, eggplant) one year, legumes (beans, peas) the next, brassicas (cabbage, broccoli) the third, and roots/leaves the fourth. A simple four-year rotation keeps soil healthy and disease at bay.
What About Troughs and Kits?
Galvanized stock tanks (water troughs) make instant raised beds — just drill drainage holes and fill. They're attractive, durable, and rodent-proof. They do heat up in summer sun, so in hot climates, line the inside walls with cardboard before filling to insulate the soil.
Pre-fab raised bed kits (corner brackets that hold your boards) are great if you're not confident with tools. They simplify construction and let you replace individual boards as they rot.
The Bottom Line
A well-built raised bed is an investment that pays back for years. Start with one — a 4' × 8' bed is plenty for a first season. Get the soil right, don't overcrowd, mulch heavily, and water consistently. You'll be amazed at what you can grow in a small, well-managed space.
The best time to build a raised bed is in the fall, so the soil can settle over winter. The second best time is right now. Pick up some cedar, grab a drill, and build something that'll feed you for the next decade.
For more on what to grow, see our container gardening guide (many principles overlap), composting guide for building your soil, and plant guides for crop-specific advice.

We write practical, encouraging gardening guides for home gardeners. Every article is rooted in real experience — and a deep belief that everyone deserves a joyful outdoor space.